Thursday, February 28, 2013

Nausicaa pouch!

So before I had even started making my Nausicaa costume, I had (unsuccessfully) tried to hand-sew a leather purse....Yeah...never doing that again! But now that my machine is back and running, I was able to finish the purse I had started. And the best part is that I think I can use it for my costume!

Ta Daaaaa!!!
I'm so happy about this purse! The only thing I have to do next is add some belt loops so I can slip in a belt and I'll be ready to go!
Next up: Belt loops!

Ha ha ha! And the best part was since these were thigh-high boots, I still use the bottom half of what I cut off! And I was feeling silly so I took a dancing boot picture!
The purse and it's parents!

Small post!

What happens when you give me some lovely baking clay? Why I make some little earrings!! 
I'm planning on making a whole Alice in wonderland set of jewelery (headband, earrings, necklace, possibly ring). Since I was thinking on those lines, these pretty mushrooms popped into my head!
Eat Me!
 They are nice and sweet. I'm really digging making my own jewelry with this clay. The best part is that the clay just stuck to itself. I didn't have to force the little spots down or the stem into the mushroom hat, and it's so cute!!

Nausicaa shirt!

I know it's been a while since I've last posted, I've been a little busy with my job lately, they increased my hours (yay!!) which means less time on the internet (boo!). Ha ha ha!

However, that has not stopped me from working on my costume! I'm so happy, I'm cutting it a little close with only a week and a half left until MegaCon, but hey! Nothing like incredible excitement to give you incentive to finish, right?

And here we go!
Applique fun!
I got the bird on! Woot! I was going to sew this with the sewing machine, but I ended up just doing it all by hand...Ha ha ha! This is what happens when I zone out and just start sewing.

So excited!!

Sunday, February 24, 2013

Tunic Update!

I am so happy to show the progress of my lovely tunic! It's coming along swimmingly!
I added the collar and the buttons (to hold the collar closed) and finished the seams on the sleeves!

I'm liking the buttons!

Yay! It's so close to being finished!

I like the split look!
 As some of you may have noticed, I'm merging the two tunics Nausicaa wears in the movie to make one awesome costume!

                                                                            gallery.minitokyo.net
                  nausicaa.net

I also made some earrings for me to wear! I don't think they will actually be visible under the awesome hat, but I just had to make some!
Ohmu!
The first time I saw this movie, I could not stop drawing bugs for a week! Ha ha ha! But the beloved and sweet ohmu is my favorite.

Paopu Fruit!

For those of you who don't know, I am a huge Kingdom Hearts fan! Throughout the series they focus on several important points, like friendship, love, hope, forgiveness, and all those fuzzy warm feelings. And they also like to share fruit. But not just any fruit. The elusive star-shaped Paopu fruit! 
This fruit is pretty great. If you share one, your destiny becomes intertwined with the other person. Yeah, you heard me, DESTINY. And as my dear game crush will explain...


Courtesy of tumbler.com

And because of that, what KH fan would be without her Paopou fruit? I for one like to equip all possible items that will help me in real life. So I present the beautiful destiny-filled fruit earrings!!
I can FEEL the destiny powers these hold!

So cute!
While I may not be able to actually share these with someone (not sure I want to eat polymer clay....) I can share it with the world! Lucky me, my destiny just increased 100%! Ha ha ha! 

Monday, February 18, 2013

Hat and Goggle Attack!

Or not. But this hat is coming along so quickly!
My next step was to add a "stiffening factor" to the hat  so it would stand up, just like the real Nausicaa's. 


ponderingsofallthings.blogspot.com


Recognize that fabric? That's right! It's the template for the hat fabric! And template for the gloves! Such a useful piece of scrap fabric, and that's why it shouldn't go to waste! Plus, it's the sort of unyielding fabric that is never good for any project! And I think I'm going to move on!

And here is a small photoshoot of what the hat is going to look like! Obviously there is still some tweaking needing to be done, but still!!!! I was also happy that I unintentionally matched the colors with my eyeshadow. Good times! 


All in all, I think this will be a success! :D It's really been rewarding to see it all come together!

Nausicaa hat Goggle insertation!

So after several attempts and lots and lots of thinking, I have finally found the solution to the goggle hat combo!
Voila!!
I simply measured the length of the goggles, cut a cross into the fabric and popped the goggles in to make sure it fit! Yay!! I love when the simple solutions work better than the complicated one I had in my head.
Side view of hat! With Goggles!!!!!!
Here's looking at you!
I was jumping up and down with joy when I finally figured this out!! After that I attached the headband to the hat (so it would fit on my head)! I just have to line this sucker and it will look beau-ti-ful!

More to come soon!

Totoro!

Totoro. The iconic face of all anime conventions! So cute, so loveable and such a great movie!

 fanpop.com

In Florida we have had a minor cold snap, (down to 40 degrees) but when the sun comes back out it thaws back to a nice 60. Unfortunately, the fruit stand I work at is the type that keeps the heat in when it's hot and the cold in when it's cold. So although 40 degrees might not be too bad if you are walking around, it gets a little chilly when you are standing in the same place for a few hours!
My solution? I needed a headband ear warmer! Yay! I got a grey one with little ears for Christmas, and after an hour of embroidery...
Yay! Warm head!
It looks adorable! Yay! I even tried to embroider a little leaf hat, but ran out of green thread. :-( 
I'll finish some time, but it ended up looking really cute! 
Everyone at work thought it was a cat, and it made me feel great to have a secret of what it REALLY was! Bwahahhahaha!
So much fun!
I may move the whiskers out and add that iconic smile under the eyes, but for now, it's perfect and warm!

Friday, February 15, 2013

Gloves!

I decided to take a small break from the hat and goggle combo, and start on the gloves!
I've never actually sewed gloves, but It shouldn't be too difficult, right?
Trace first!

It reminded me of the turkeys I used to make!
So I used some more of the scrap fabric I had to make a template.
Ta Da!
And it ended up looking pretty good! So I just decided to trace it again on the real fabric....and the results, well...Let's just say I wasn't going for the oversized cookie monster hand look!

Ready to sew!
COOKIE!!
But I took some of the fingers in, aaaand!
Besides some of the tips of the fingers, they ended up looking pretty good! A little more tweaking and I think these babies will be ready!
Half done, half awesome!

Goggle trouble

Well, I couldn't figure out how to attach the goggles after hours of puzzling, so I had to let it sit for a night while contemplating possible options.
The next morning, I thought if I could just attach the goggles to the hat without any intensive sewing it might work.
Sew sew so much fun!
And although it ended up being more sewing than I expected, I think they'll attach a lot more easily than what I had planned. Success! It ended up looking a lot more cool than I was expecting as well!

Close up on the cool!

Tuesday, February 12, 2013

Nausicaa hat! Where do I cut holes?

I left off the last post where I finished the template of Nausicaa's hat. The next part was were the trouble started!
I decided that since Nausicaa's goggles are a little more oval shaped than most of the others in the movie, purchasing some swim goggles would be perfect!
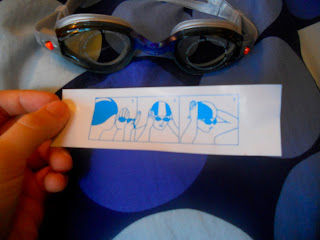
With helpful guide to wearing!
Ta da! But the best part about these were the overly informative picture instructions! I thought it was so funny I took a picture! I wish they came with captions underneath...Maybe I can improvise! First box, "What are these?!" Second box, "I can see my dreams coming true!" Third box, "Ready for some serious action shots!!"
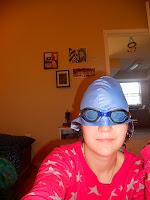
It's really hard to take a picture when you can't see!

So the next step was trying to measure where these suckers were going to go in comparison to the template hat. I put the template hat on, put the goggles over it, and then traced the goggles with a sharpie, thinking maybe I could just wear the goggles underneath the hat without any messy sewing.
Sharpie-rific!
Then I took the hat and cut where the holes were to see if my original plan would work. Which I don't think it will anymore. those oval goggles require some serious sewing skills.
At any rate, I went ahead with my template to start the hat. I figured that since the fabric is so different it won't really make a difference if I kept fooling around with the template.
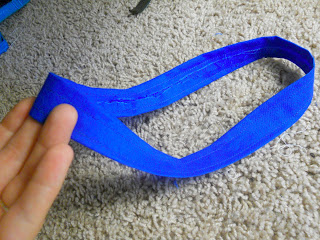
Circumference of the head headband!
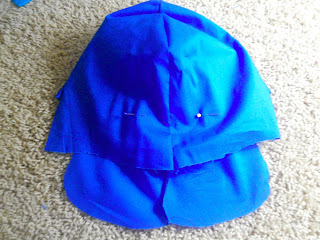
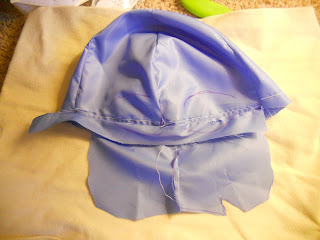
hat all together!


Pins mark where the goggles need to go.
I think I'm going to have to create a double hat and sew those beautiful goggles into the hat...I'll work on it tonight and keep you posted! All in all, I'm excited to see how it works out!

Beginning of the hat!

The next challenge for the costume is the versatile hat Nausicaa sports. Not only does it have cool goggles embedded in it, it also looks stylish when she pulls it back!

Needless to say, I've never actually sewed a hat before, so this part is a little daunting...Especially since all the cosplay costumes I've seen, everyone skips out on actually being able to use those cool goggles! So, first things first, I needed to create a template for that hat!

Wizard one! Wizard two!
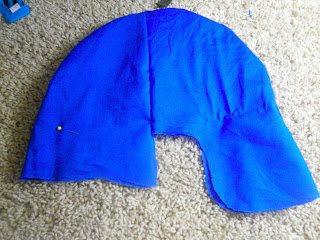
I cut two little rounded wizard hats from a scrap piece of fabric. This hat is a modified pilot's hat, meaning the back was going to be easy peasy, but I needed to create that pointed tip at the top. I cut the pieces bigger than I thought I would need and then sewed them together.
Cut and sew again!
My first try was a little too big and pointy, so I took it down until it fit the front.
Then I measured a small piece of fabric around the circumference of my head to make the hat fit, and sewed the two front pieces to that!
Measure twice, cut once! Then measure again and cut again...
Then I neatly folded the two pieces together and laid them ontop of yet another scrap piece. I drew the outline of the back from that measuring point! Sorry, the sharpie didn't really show up... :'(
It was all coming together.


Fox shirt

This is a lovely shirt I threw together when I first moved to Florida. I realized that although I mostly prepared myself for the climate change, I was going to have to do some serious revamping of my wardrobe. This shirt was a great long-sleeved number, but those frills in the front drove me crazy! Even after I ironed them, they would not stay flat.
So! I took the sleeves off and embroidered a fox and some sakura blossoms. Problem solved!

It really is a great lightweight shirt! It was my first time embroidering a fox, I think he turned out pretty well!

Monday, February 11, 2013

Problem Pants

In the last photo I posted I was sporting the white pants along with the pretty top. This was a last-ditch effort to ignore the signs that I was going to have to do major revamping on those pants...

First mistake, I used a pair of stretchy pants for my template. Looking back, I probably should have cut the seams lot more generously since I realized that the white fabric was different from the original stretchy pants. But did that bother me? Nope!
The original template
Soooo.....what I ended up with is a beautiful skin-tight pair of pants that make it impossible to sit...or really move....
If you look closely, you can see my veins.


 It was clear I need to employ a more energetic solution!! I decided to just add a nice panel on the side of each of the legs.
I laid the pants down flat and pinned them to make sure that my cutting experience would be easy as pie!
I just cut from the seam I made! Yay!
 Then I folded the cut pant legs onto the uncut pant leg.
ready to cut again!
Then from there I cut two equal strips of cloth and sewed it back up! And here is the finished product! I know they look a little grandma pant-sy but they are super comfortable! Plus you won't even see that beautiful top under the tunic. That skirt I bought from goodwill was the perfect template for the top of these pants too!
Finished! Yay!
 And here is a picture of the seamed sides. I actually think it looks pretty good.
Yay! They fit!
I think I can say this was a success! Problem solved!!
Fancy Pants ready for fun!